Changing your Photo Scanner Settings
Modifying scanner settings is an easy enough task. As there are lots of types of scanners and various ways of accessing the settings so I will stick to the most generic approach.
Mind you…. you could always use a search engine to find the exact scanner settings tutorial or manual. Just type in your “make and model” and keywords “change scanner settings”
The approach below is for Windows PCs:
- Choose Start→Control Panel. Type scanners in the Control Panel search field and press Enter.
The Control Panel window appears.
- Click View Scanners and Cameras.
You see a list of installed scanners in the Scanners and Cameras ..etc
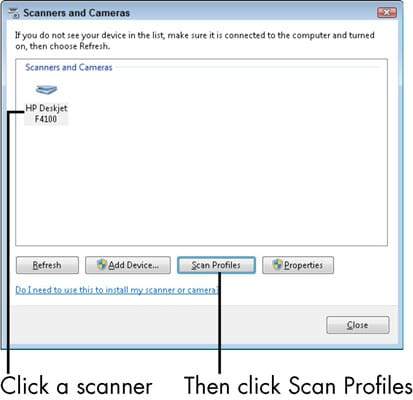
- Click on your scanner in the Scanners and Cameras area and then click the Scan Profiles button.
The Profiles dialog box appears.
- Click Edit.
The Edit Default Profile dialog box appears.

- Review the settings.
These settings may include (depending on your scanner model) colour management for fine-tuning the way colours are scanned and resolution settings that control how detailed a scan is performed. (The higher the resolution, the crisper and cleaner your photo will be, but the more time it may take to scan.)
- Click Save Profile to return to the Properties dialog box and then click the Close button twice.
The Profiles & Scanners and Cameras windows will close.
- When you’re ready to run a scan, place the item to be scanned in your scanner.
Depending on your model, the item may be placed on a flat “bed” with a hinged cover or fed through a tray. Check your scanner’s manual for the specific procedure to initiate a scan (for example, pressing a Scan or Start button). After you begin the scan, your computer automatically detects it and displays a dialog box showing you the scan progress and allowing you to view and save the scanned item.